
Hammertime is reader-supported. When you buy through links on our blog, we may earn commissions.
When Stephen was building the shed, he had originally planned on purchasing doors to go on it. He started looking into how to build doors, and was surprised at how simple it was! A bonus of building your own door is that you can customize them to be whatever size or style that you want.
He measured the size of the area before he built the shed, so he knew the size to frame out for in the framing stages of the shed. He wanted to do double doors, so he built two door frames out of 2x4s.

He used pocket holes on the top and bottom to hold them into the sides. Pocket holes hide the screws from being screwed in on the sides.

He purchased two 3/4 inch pieces of plywood. Once the frames were done, he cut the plywood to the same size of the frames. He attached them together using screws.


In our case, since these doors were for the shed, Stephen put the shed siding on the outside of the doors. He screwed the siding into the side that had the frame (pictured above). Since they were going to be double doors, he cut the siding short on one door, and extended the siding on the other door, so that they overlapped and sealed each other off. You can see below how the siding was cut shorter on this door. The other door’s siding extended beyond the wood so that it fit perfectly onto this wooden section on its neighbor.

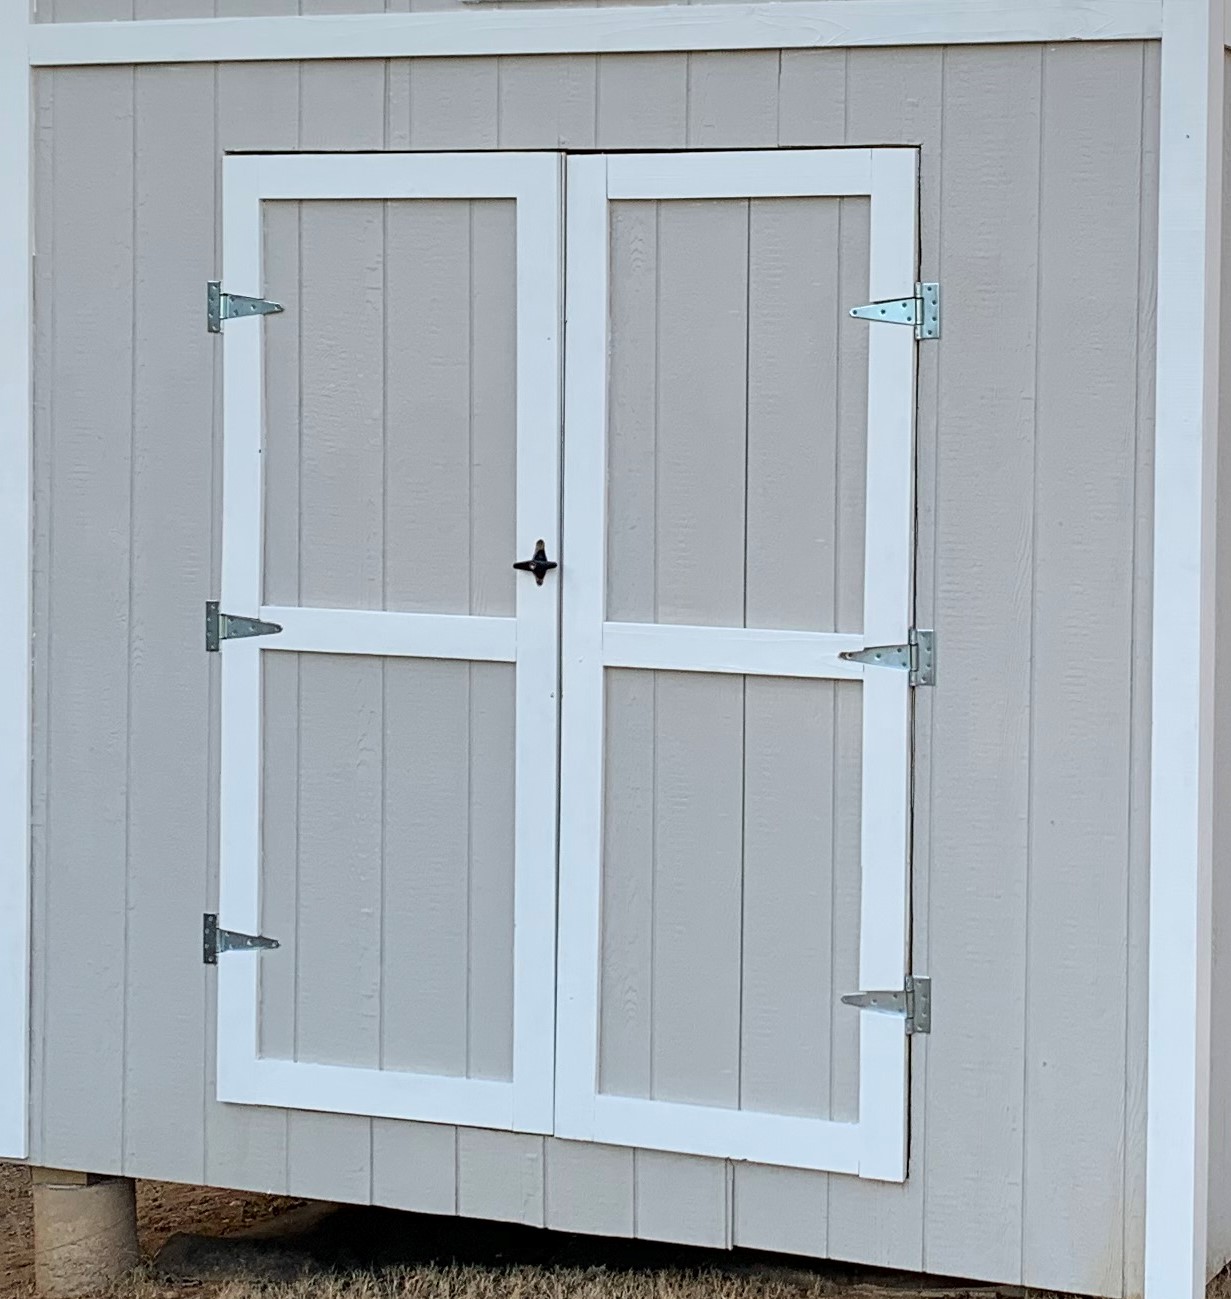
He added in hinges, and eventually the handle and lock.


Stephen then installed the doors. This was a two-person job! I would hold while he would screw in the hinges.


One tip: Stephen used these shims (that were all the same height) to set the door on as we were installing it. What this did was keep a steady gap between the bottom of the door and the flooring so that the door wouldn’t drag on the floor everytime it was opened. These shims were only about 1/4 inch high- it was enough space so that the door wouldn’t drag, but not too much space for unwanted things to get in.

Once the doors were installed, Stephen added trim. This is where you can have your fun! You could do diagonal pieces of wood, you could make the farmhouse “X”… whatever you want! Stephen went with this style, which is simple yet makes a statement.


Ta-da! The completed doors. They are functional, very sturdy, and work great! Plus, they were a fraction of the cost of purchasing doors at a retail store would be.

While this method would probably only be recommended for shed doors, the concept of building a door would be a somewhat similar process. Want a barn door for your house? Look it up! You can do it.
If you’re interested in the door handle that we bought, we got it here from Amazon.