
Hammertime is reader-supported. When you buy through links on our blog, we may earn commissions.
‘Tis the season! With all of the holiday music and decorations around, I kept eyeing these pieces of scrap 6×6 wood that Stephen had in his workshop, envisioning making cute snowmen out of them. Finally, I buckled down and went to it. And I’m so happy that I did!
The pieces of wood were all pretty square-shaped, but definitely needed to be straightened out a bit.

Stephen helped me with the saw, since these suckers were super thick. The saw blade cut down through half of the wood, then he had to flip it over to cut through the rest of it.

He was able to get these pretty leveled. I was going for a rustic-snowman look, so I was fine with it not being perfectly flat and smooth.

My daughter helped me paint these pieces of wood white. We used Rustoleum Chalk Paint in Linen White. It took two coats to cover each one.


The next part was the trickiest part, and I definitely needed Stephen’s help with this. We bought some extra long bolts from Lowe’s, ones that were long enough to connect the length of the three pieces without going from complete top to bottom. (We didn’t want the bolt to stick out on the top or the bottom).

Stephen used his drill with some spade bits that drilled a wider circle. He used the 1/2 inch-wide spade bit to drill a hole for the bolt.


Stephen started with the top, smaller piece of wood and drilled a hole all the way through. He used a pencil and, after placing the top piece on the middle piece, he stuck the pencil down the hole and marked where to drill on the middle piece. He then drilled a hole in the middle piece, too. He repeated that for the bottom piece.


I have to tell you… this made a MESS!! Thick saw dust was flying everywhere! They almost looked like wood chunks, the kind we use on the grill! It was insane.
For the bottom piece of wood, since it was thicker, and the drill was super powerful, he ended up having to clamp the piece of wood to the table. Otherwise it would spin around and around super fast.


He used the inch-wide spade bit and dug in deeper on the top and bottom so that he could screw the nut on. We didn’t want the nut being put on outside the wood piece so that the snowman could sit flat, and you couldn’t get the nut in there with just the 1/2 inch hole.

Now we could pick the snowmen up by their “heads” and all the pieces would stick together!

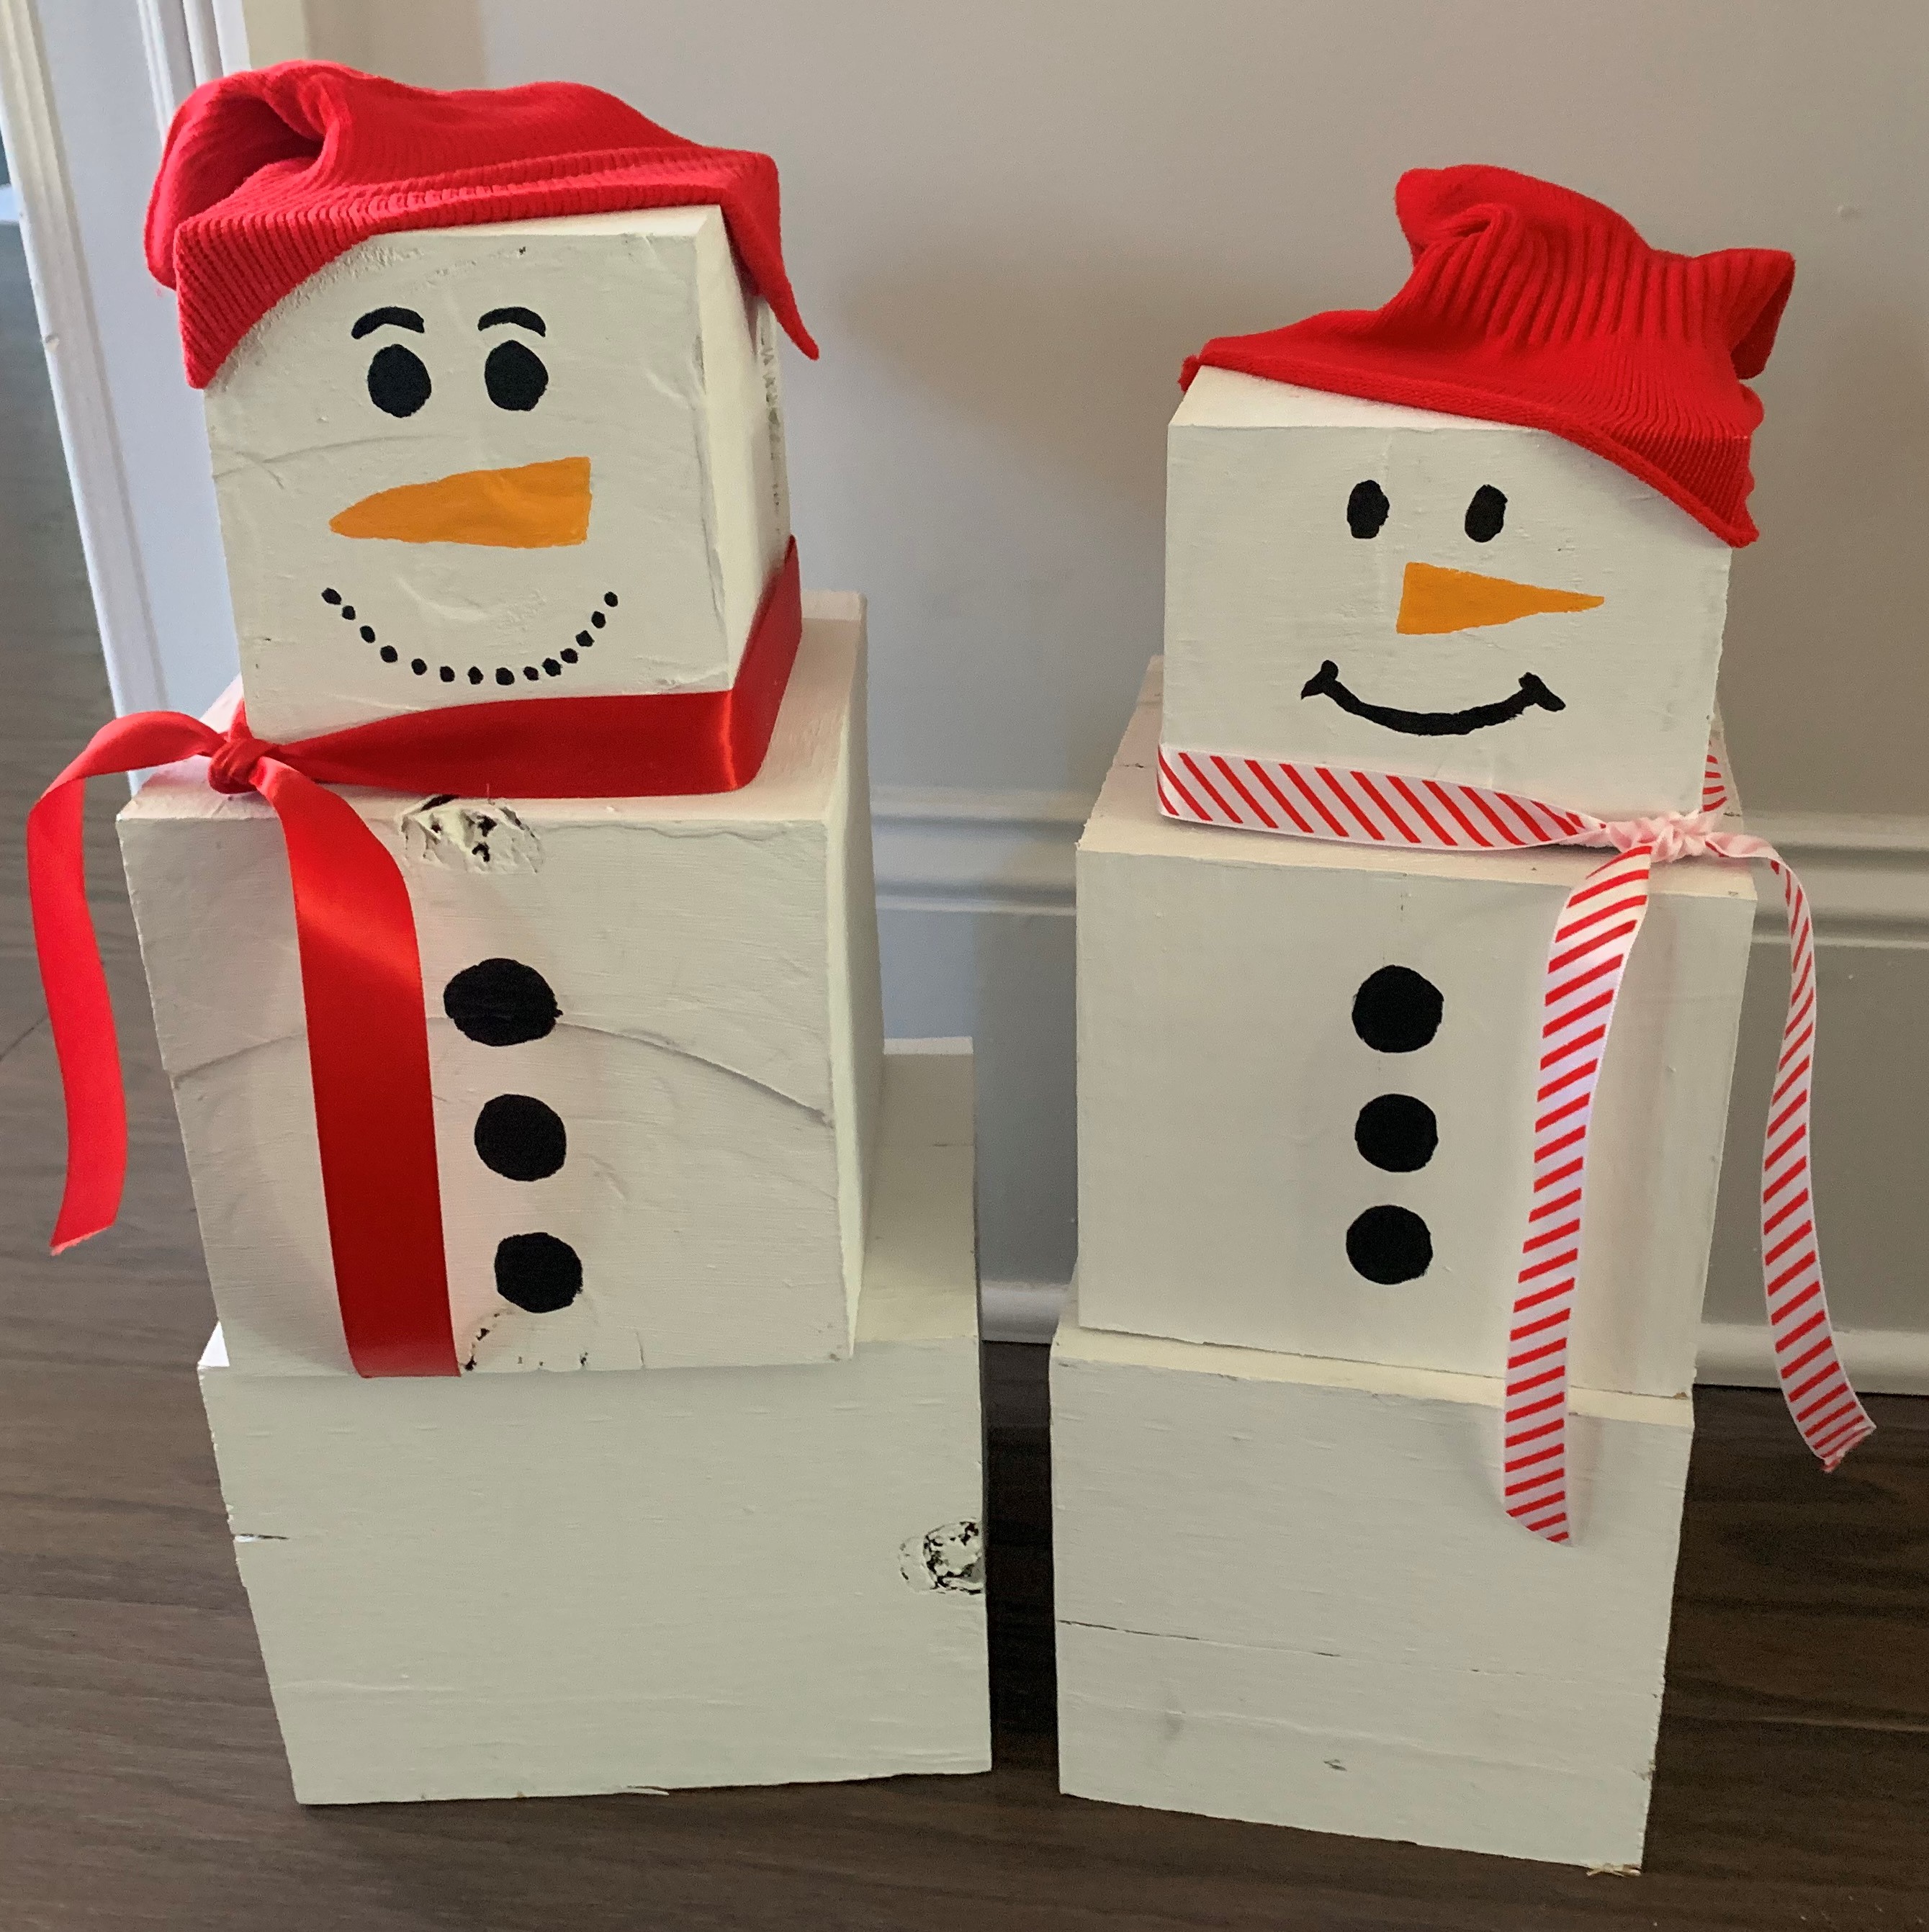
Now comes the fun part… painting and decorating them. I am no artist, but I whipped out some acrylic paints and painted on their face and buttons. You could absolutely use 3-dimensional things like buttons, fuzz balls, etc.

I found some old red soccer socks and cut them into hats, and found some ribbon to use for scarves.

And here are my cute snowmen! They are fun little holiday decorations, both for about $6 (and a whole lotta sawdust). 😉
