
Part 5 of 5- here with our grand DIY shed finale! This blog will encompass several things, like building the doors, installing the windows, adding trim, installing the vents, painting, and more.
Be sure to check out the other four shed blogs, if you haven’t already.
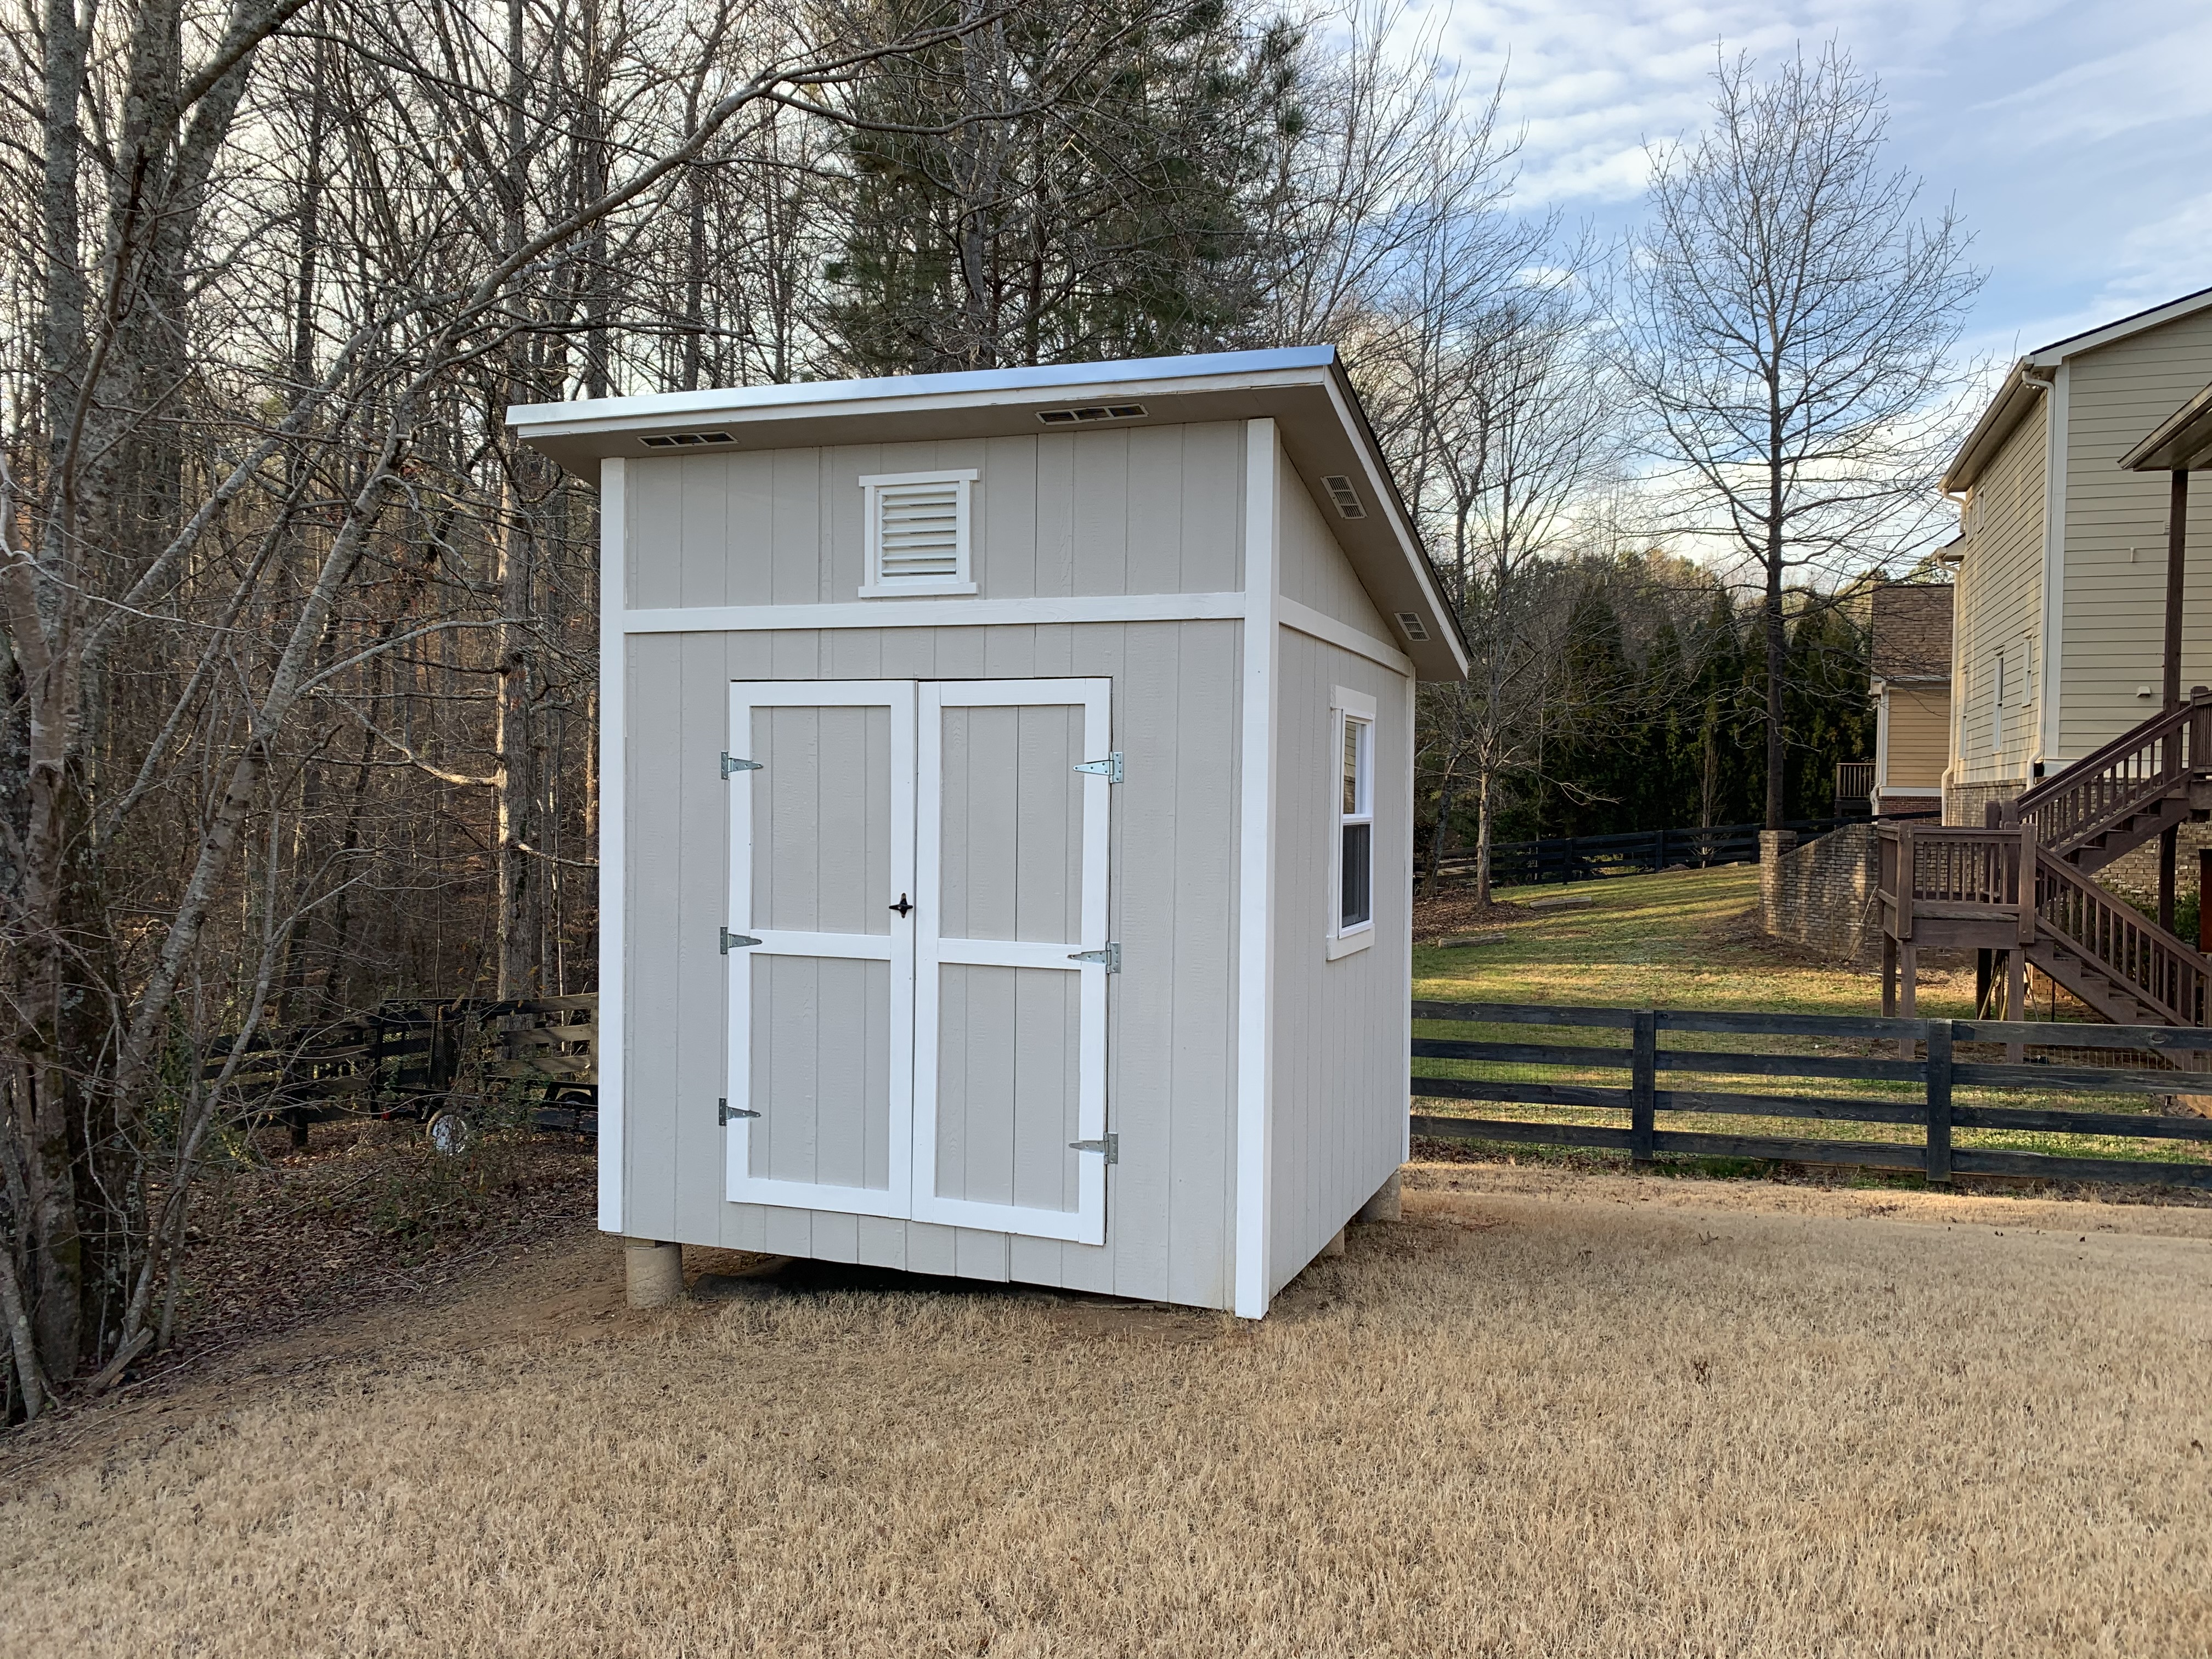
Window: Stephen had purchased a small, working window from Lowe’s for about $60. He had purchased the window early-on in the shed-building process so he could cut the framing and walls according to the window’s exact measurements. He used window tape and put it along the bottom edge of where the window would go (this prevents water damage). He screwed the window in, and then put window tape along the sides and top. He caulked along the edges of the window. He covered up the window edges and tape with 1×4 trim and caulked in any cracks, just to prevent any water from seeping behind the window.
Vents: Stephen installed a few vents, including on the front, the back, and in the soffits. They were super easy to install after the wood was cut out for them. He did the same process with the wall vents as he did the windows. He put tape along the bottom, screwed in the vent, put tape along the other sides, and caulked. He put trim around the vents on the walls, but not around the vents in the soffits. The soffit vents were just screwed in… no tape necessary since they are under the roof.


Doors: Stephen built double doors for the front of the shed. It wasn’t a crazy-hard process to make them, but I feel like the topic deserves its own blog. Check back on how he made them! Here are some pictures along the way.


Trim: After the doors were added, Stephen covered all of the siding creases with trim. The trim he did on the doors was for decorative purposes, not functional.


We painted… and painted… and painted some more… with my final, dramatic scene of falling off an 8-foot ladder while painting my very last piece of trim! (it’s like a paint massacre- white paint is all over the grass now 😉 (oh, and I am fine… just some bruises.)
Here it is, the final product:


Inside, the possibilities are endless! With it being unfinished inside, he can put hooks, shelves, nails, etc. really wherever he wants. We’re using this to store all of our yard stuff, which gives his workshop a LOT more space to hopefully make more wood projects.
Thanks for coming along our shed-building journey with us! Future plans include landscaping around it, and possibly shutters and/or a flower box by the window. I’ll definitely update you with whatever we do.