
I found a cute idea on Pinterest that I wanted to try out- a farmhouse star! It’s a pretty easy concept that makes a really cute decorative piece.
Here is what I used:
-8 foot piece of thin wood, about 2″ wide and 1/4″ thick
-twine
-wood glue/hot glue
-paint or stain of choice
-drill
-saw
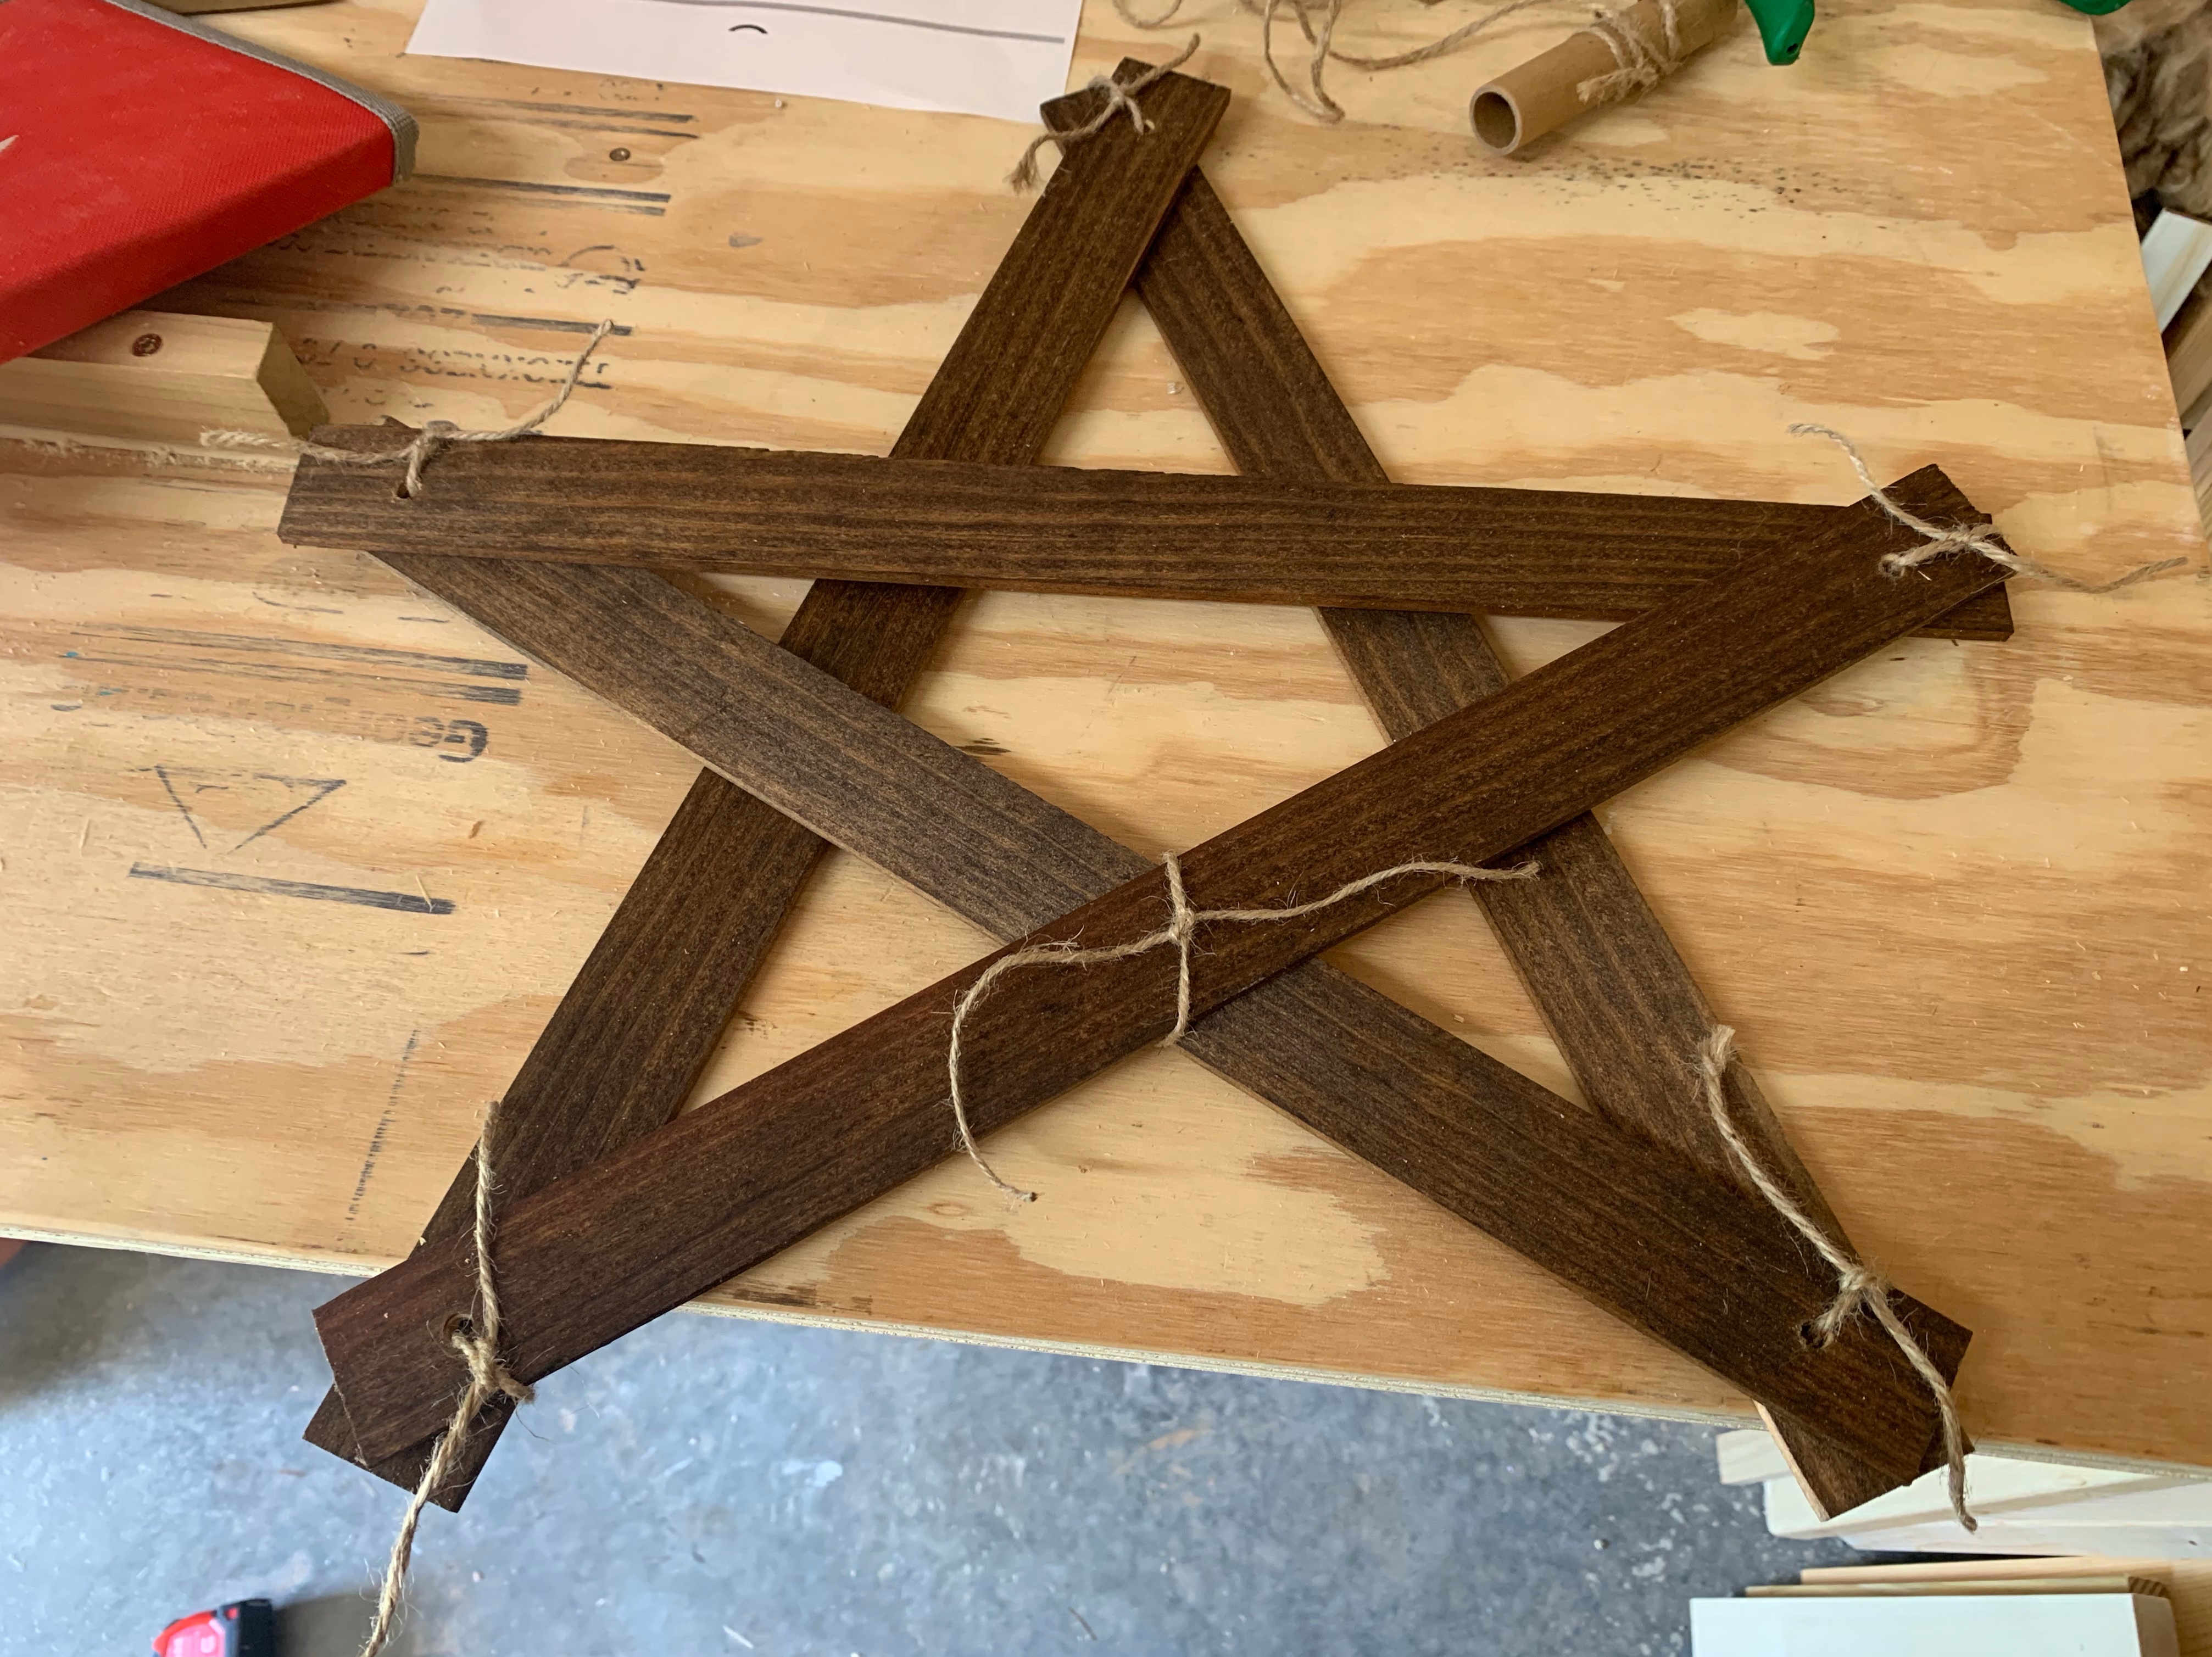
I cut five 18″ long pieces of wood.


I stained the wood with a medium brown color and let it all dry. I only stained the fronts and sides.


Once the wood pieces were dry, I drilled holes in each side of each stick.

Then, I started forming the star! I matched up the holes on two of the pieces and formed an upside down V shape. I used a piece of twine to tie them together.

I then attached the other 3 pieces of wood into the shape of a star, always tying the ends together with twine.

To help keep the star shape, I used some wood glue on some of the spots where the wood overlaps. I also tied more twine in places to keep the wood in place.


That’s it!! Super easy peasy. I will say, if I ever did it again, I would cut the wood into longer pieces. 18″ sounded like it would be big, but the completed star really isn’t very big. It would probably work for an accent piece or to hang on the front door. If you’re wanting to build a star to hang on a wall, you might want to increase the wood pieces to at least 22-24″ each!
This was a super cheap project, where everything I used, I had on hand! The board probably cost less than $5, and the twine and stain were very minimal. A great price for a fun decorative accent!