Hammertime is reader-supported. When you buy through links on our blog, we may earn commissions.

My kiddos LOVE the sport of basketball. My son has a mini hoop in his bedroom that we installed onto a wooden frame, and he plays on that all the time. The only problem with it is that there’s not a lot of room for more than one person to play.

My daughter got a mini hoop for Christmas. Instead of putting it behind her door or on her wall, she wanted to put it in our more-open loft area. That would allow for 2-3 people to play mini basketball at once!

This is what we did!

Stephen got two pieces of scrap wood, 2″ x 1″ size. He cut them to the width of the hoop, plus 5 inches (2.5 extra inches on each side). He painted them black ahead of time. He used drywall screws and screwed them into studs.

He used his level to make sure they were exactly level, and the same distance apart.

This is looking at the back of the hoop. The hoop came with door hooks already attached/screwed in. Stephen removed those and used the pre-made holes to screw the hoop into the pieces of wood.

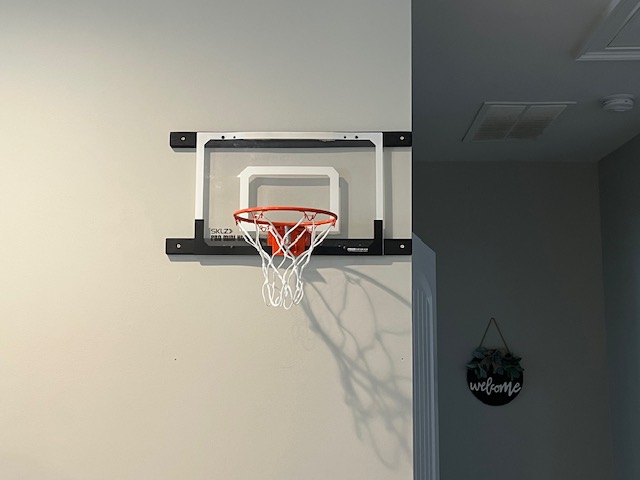
Ta-da! All attached.

This hoop has provided hours of entertainment in our household! 😉


3 responses to “Attaching a Mini Basketball Goal to the Wall”

  1. […] Explore: Attaching a Mini Basketball Goal to the Wall […]

  2.  Avatar
    Anonymous

    How did you remove the screws to remove the clips used to hang the hoop over a door? Been trying but they are extremely tight. Thanks and the hoop looks so good mounted!

    1. brookekh Avatar

      Good question, and I apologize for my delay in getting back to you! We used some pliers to get the screws off, but they weren’t too difficult to get off. I’m not sure if these will help, but here are some ideas I found online:
      -Lubricate the bolt with WD-40 and use vice-grip pliers or a long wrench to twist loose. Heat it with a torch for 15 seconds to loosen it more if needed.
      -Apply rust-penetrating liquid thread loosener and strike the bolt 6-12 times with a hammer.
      -Use a screw extractor.
      -Cut the screw off with a reciprocating saw.
      -Place a rubber band over the screw head.
      -Stick a piece of duct tape over the screw.

      I hope you’re able to get it! My kids use this every day- it’s a fantastic source of entertainment 🙂

Leave a Reply

Discover more from it's hammer time: a beginner's diy journey

Subscribe now to keep reading and get access to the full archive.

Continue reading