
Hammertime is reader-supported. When you buy through links on our blog, we may earn commissions.
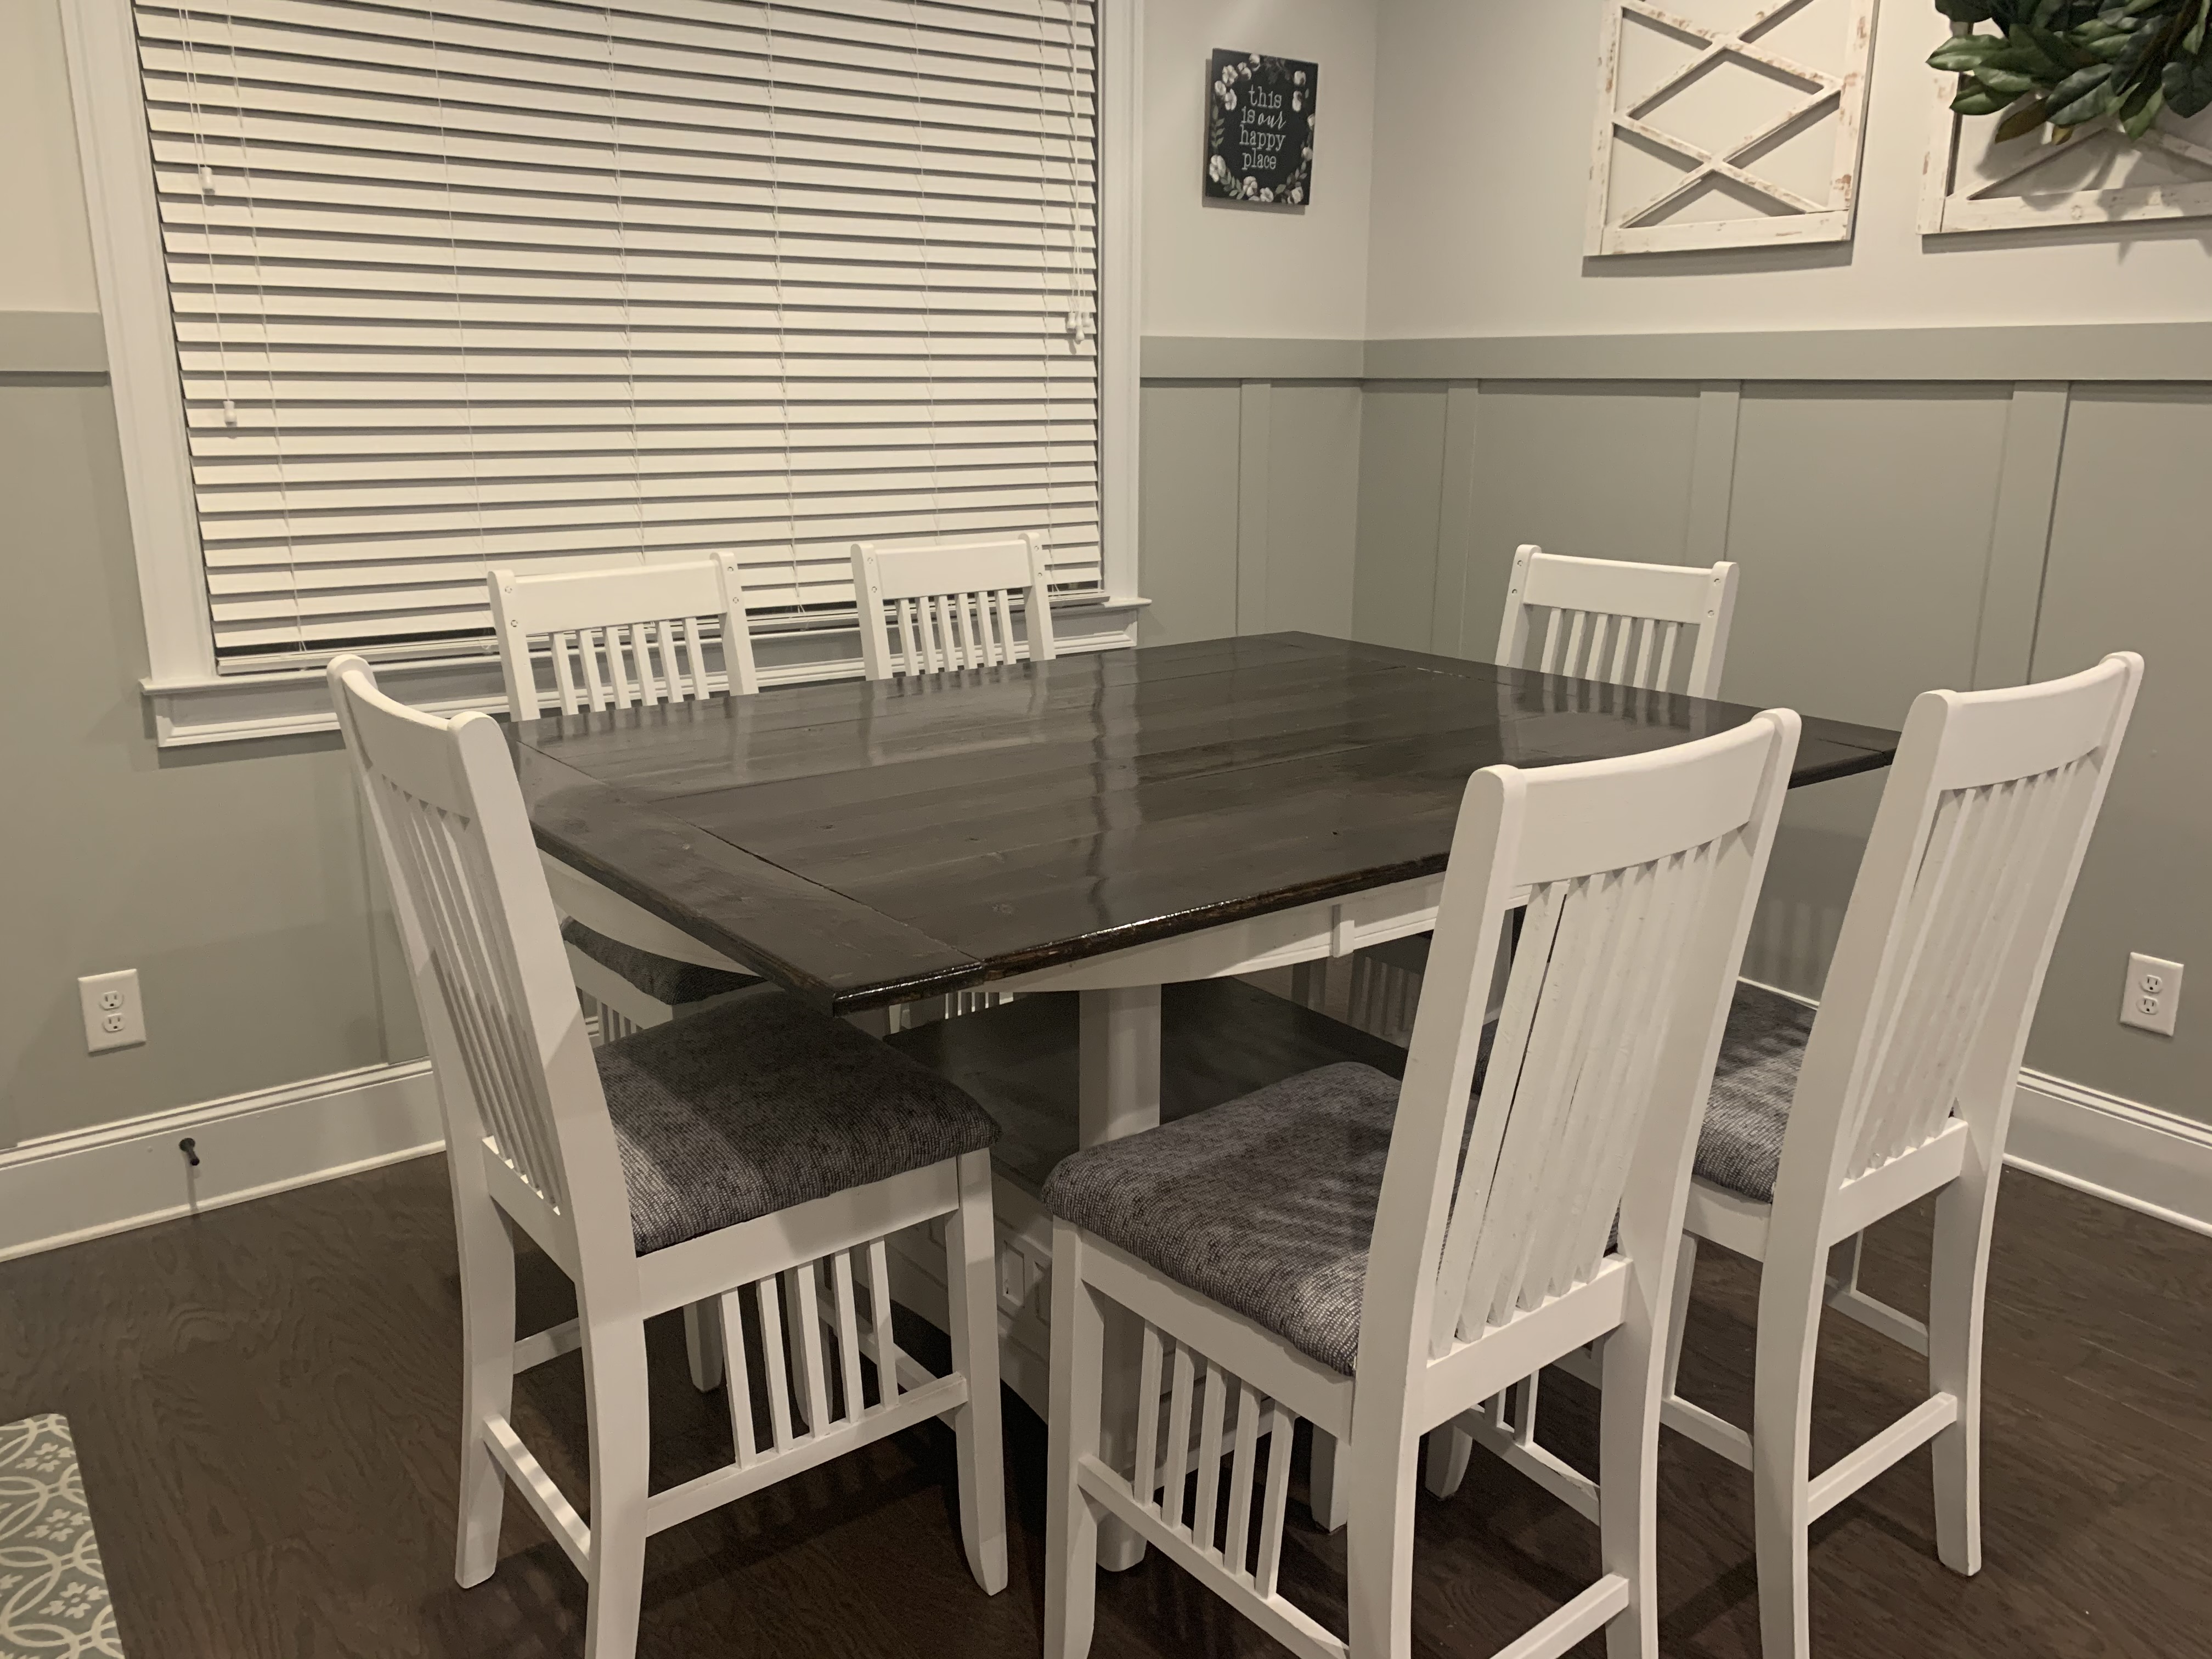
We got an oval-shaped kitchen table from Rooms to Go about 10 years ago. It is really nice… the table is counter height, and there’s an expander in it where it can go from being a circle to being an oval. It seats 6 people very nicely, and there’s some storage space underneath the table. It was a medium-dark brown color with matching chairs.
In the last couple of years, the top coating of the table started to… how do I explain this? It almost rubbed off when you cleaned the table. Then there would be blotches on the top of the table where the coating was and where the coating wasn’t. It just looked kind of gross, for lack of a better word. 🙂 Almost like there were grease spots, which were really just the parts of the table where the coating had not worn off.

But the table itself was GREAT! So Stephen and I started brainstorming ideas on using the original table while changing the top of it. We knew just painting the top wouldn’t be ideal, and we didn’t really want to sand it and re-stain it. I found some great ideas on Pinterest about adding pieces of wood across the top and giving it a farmhouse look, which we liked. The only problem was that none of these tables had an oval base- they were all rectangular to start with. So, we took some peoples’ advice but also had to brainstorm our own plans!
We knew that wood across a table would look goofy in an oval shape, and that we’d have to make it into a rectangular shape. While Stephen started working on a rectangular top for the table, I started painting the base of the table white. (And the chairs… and those suckers took FOREVER!) I used my go-to chalk paint, Rust-Oleum Ultra Matte Interior Chalked Paint in Linen White (you can get it here from Amazon), and it didn’t disappoint! (though it did take 3 coats to cover the dark wood). BEGINNER’S TIP: It is so much easier to paint furniture ahead of time, before making additions. It is also so much easier to stain something before installing it. Just make sure you get started well ahead of time! Sometimes it may take more coats than you originally thought.

Stephen and I measured the table, and figured out the best combination of wood… since there are 1x4s, 1x6s and 1x8s out there, we had to do the math and draw out pictures of what the different wood combinations would look like. We ended up going with 1x6s going horizontally across the table, and 1x8s going vertically on the ends. BEGINNER’S TIP: Did you know that pieces of wood don’t actually measure what they are called? For example, a 1×4 actually measures 3/4 inches by 3.5 inches; a 1×6 is actually 3/4 inches x 5.5 inches; and a 1×8 is actually 3/4 inches by 7.25 inches.

It took nine 1x6s to cover up the 47.5 inch width of the table (and going over 1 inch on either side). Stephen cut the length of the 1x6s to end where, when the end 1×8 pieces are added, it went to the longest point of the oval. He used pocket holes and wood glue to connect the wood pieces to form the shape of the rectangular top.
We repeated the following pattern 4 times: stain, polyurethane, sand. The final step was another coat of polyurethane, and it was done! This took about 4-5 days to do, in order to let the stain and polyurethane dry thoroughly before the next step was done. Now, it was ready for install!
We placed the rectangle on top of the table and we made sure it was straight and even. Stephen drilled in screws from the bottom up to hold the top in place. BEGINNER’S TIP: Just MAKE SURE that the screws are long enough to grab hold of the wood, but not too long that they would go through the top of the wood! Stephen usually just eyeballs it and holds the screw up, starting where it would be drilled in to see where it would end.


It’s such a nice feeling to have the feel of a new piece of furniture while being able to utilize an old piece of furniture. This whole project cost us about $80 in wood and $18 in paint… so less than $100 for a “new” table!